


Running OpenClaw on the NVIDIA Jetson Orin Nano Super Developer Kit gives you a compact but powerful edge AI environment. Once your Jetson device is ready, you can set up OpenClaw in just a few minutes using the official installer and interactive onboarding wizard.
What You Need Before Installing OpenClaw
Before proceeding, ensure:
- Jetson Orin Nano Developer Kit is powered on and updated
- JetPack is installed
- Internet connection is active
- Terminal access is available
Once these are confirmed, you are ready to install OpenClaw.
Watch the complete step-by-step OpenClaw installation on Jetson Orin Nano Super before proceeding with the written guide below.
Step 1: Set Up OpenClaw Using the Official Command
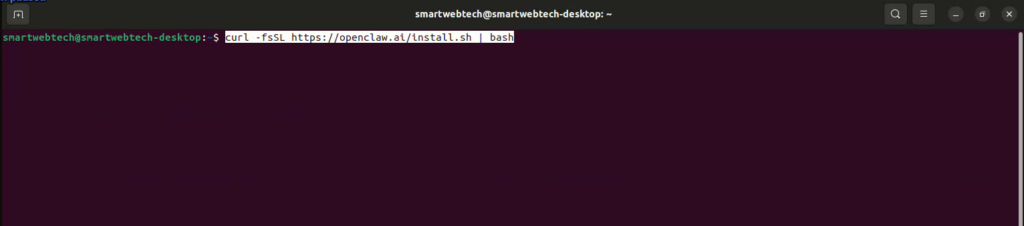
OpenClaw provides a one-command installer that simplifies the setup process. You just need to copy the official installation command from the OpenClaw website documentation and paste it into the Jetson terminal to begin the installation.
Open Terminal on your Jetson device.
Paste and run the official installation command:
- curl -fsSL https://openclaw.ai/install.sh | bash
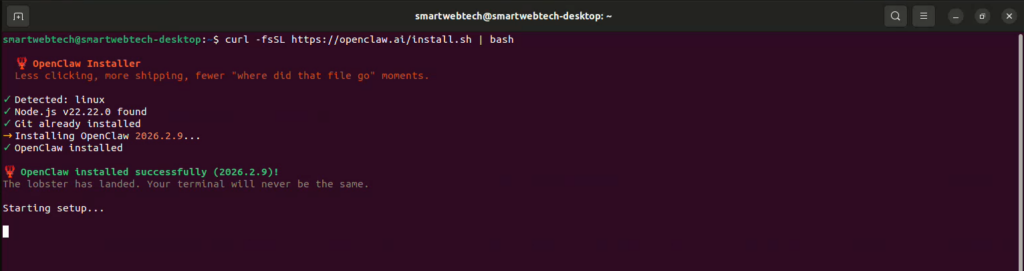
After pressing Enter, OpenClaw will automatically:
- Download required components
- Install the Gateway service
- Configure system services
- Launch the onboarding wizard
You do not need to manually clone any project files or create a Python virtual environment. The installer handles everything.
Step 2: Security Confirmation Screen
Once installation begins, OpenClaw displays a security notice.
You will see:
- I understand this is powerful and inherently risky. Continue?
- Yes / No
Select:
- Yes
This confirms you understand that OpenClaw can execute actions and should be used responsibly.
Step 3: Choose Onboarding Mode to Set Up OpenClaw
Next, OpenClaw asks you to select the onboarding mode:
- QuickStart
- Manual
Select:
- QuickStart
QuickStart automatically configures default settings, including:
- Gateway port: 18789
- Local bind address (127.0.0.1)
- Token-based authentication
- Local dashboard access
For most Jetson users, QuickStart is recommended.

Step 4: Select Model Provider
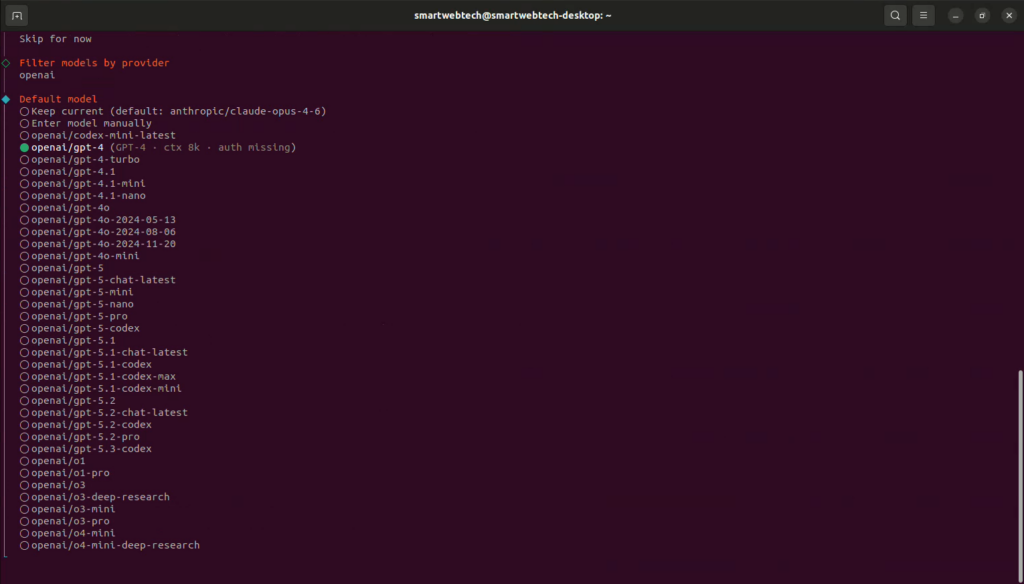
After choosing QuickStart, OpenClaw prompts you to select a model provider.
You will see multiple options, such as:
- OpenAI
- Anthropic
- Hugging Face
- Others
For example, the provider selected was:
- OpenAI
Then OpenClaw sets a default model:
- OpenAI/gpt-4
If no API key is configured yet, you will see a warning message indicating authentication is not configured. This is normal. You can add your API key later through configuration.
Step 5: Channel and Skills Configuration
OpenClaw then asks whether you want to:
- Configure skills
- Enable hooks
- Select messaging channels
These settings can be configured later from the dashboard.
You will see a status section like:
- Skills status:
- Eligible: 3
- Missing requirements: 46
- Blocked by allowlist: 0
This simply means optional features are not yet configured.
Step 6: Install and Set up the OpenClaw Gateway Service
During onboarding, OpenClaw installs a system service automatically.
You will see:
- Installing Gateway service…
- Gateway service installed.
This confirms:
- The backend service is installed
- The systemd user service is configured
- The gateway is running
OpenClaw uses Node for the gateway runtime in QuickStart mode.
No manual service setup is required.
Step 7: Access the OpenClaw Control UI
After installation completes, OpenClaw displays a Web UI link:
- http://127.0.0.1:18789
Open a browser on your Jetson device and navigate to:
- http://127.0.0.1:18789
You should see the OpenClaw Gateway Dashboard.
On the dashboard Overview page, you should see:
- Gateway status: Connected
- WebSocket URL
- Gateway token
- Health status indicator
If the status shows Connected, your installation was successful.

Step 8: Verify Agent Configuration
Navigate to the Agents tab.
You should see a default agent created:
- main
The primary model should display:
- openai/gpt-4
This confirms that the agent workspace was successfully created during onboarding.
Step 9: Open Dashboard Manually
If the browser does not open automatically, run:
- openclaw dashboard –no-open
This command ensures the dashboard service is running and provides access instructions.

Optional: Add API Key
If you selected OpenAI as your provider, you will need to configure your API key.
You can configure it later using:
- openclaw configure
Or by updating the environment variable:
- OPENCLAW_GATEWAY_TOKEN
Once the API key is added, refresh the dashboard and test the agent.
Confirm Gateway Service Status
To confirm the gateway is running:
- systemctl –user status openclaw-gateway
If the service is active and running, your setup is stable.
Common Issues and Fixes
Port Not Accessible
Make sure nothing else is using port 18789.
Dashboard Not Loading
Restart gateway:
- systemctl –user restart openclaw-gateway
API Model Not Working
Ensure your provider key is correctly configured.
Deploying OpenClaw on Jetson for Production?
Setting up OpenClaw on Jetson Orin Nano Super is straightforward for development. However, production deployment involves performance tuning, security hardening, and scaling across multiple devices, which requires deeper technical planning.
At Smart Webtech, we go beyond basic installation and deliver production-ready implementations.
We can provide:
- Custom AI workflow development
- Secure gateway and API configuration
- Performance optimization for edge AI workloads
- Ongoing system maintenance and technical support
If you need OpenClaw-powered AI automation in a real-world business environment, we can manage the complete deployment, optimization, and scaling for you.
Conclusion
Installing OpenClaw on the Jetson Orin Nano Super is straightforward when using the official one-command installer. The process includes:
- Running the install command
- Completing QuickStart onboarding
- Selecting model provider
- Installing the gateway service
- Accessing the local dashboard
There is no need for manual project downloads or complex configuration steps. The interactive setup handles everything automatically.
With the gateway connected and the agent created, your Jetson Nano Super setup is now ready to run OpenClaw for AI applications, automation tasks, and edge workloads.
Once configured, you can expand further by enabling channels, adding skills, or connecting additional services through the Control UI.
Your OpenClaw environment is now successfully running on Jetson.

